
Unit
testing is a common practice in test-driven development (TDD)
Java
code can be unit tested using a code-driven unit testing framework. The
following are a few of the available code-driven unit testing frameworks for
Java.
1.
SpryTest
2.
Jtest
3.
JUnit
4.
TestNG
JUnit
is the most popular and widely used unit testing framework for Java. It allows
developers to unit test the code elegantly. Apparently, TestNG is cleaner than
JUnit, but JUnit is far more popular than TestNG. JUnit has a better mocking
framework support such as Mockito, which offers a custom JUnit 4 runner.


JUnit
4 is an annotation-based, flexible framework.The following are the advantages
of JUnit 4 over its predecessor:
·
Instead
of inheriting from junit.framework.Testcase, any class can be a test class. It
doesn't force you to extend the TestCase class.
·
The
setUp and tearDown methods are replaced by the @before and @after annotations
·
Any
public method annotated as @test can be a test method
Exploring annotations
1.
@Test
The @Test
annotation
represents a test. Any public
method
can be annotated with the @Test
annotation
with @Test to make it a test
method. There's no need to start the method name with test.
Example:
@Test
public
void someTest2() {
System.out.println("\t\t
someTest2 is invoked");
}
2.
@Before
and @After
JUnit 4 provides a @Before annotation. If we
annotate any public void method of any name with @Before, then that method gets executed before every test execution.
JUnit 3 has a setUp() method for this
purpose.
Similarly, any method annotated with @After gets executed after
each test method execution. JUnit 3 has a tearDown() method for this
purpose.
3.
@BeforeClass
and @AfterClass
JUnit 4 provides two more annotations: @BeforeClass and @AfterClass. They are executed only once per test class. The @BeforeClass and@AfterClass annotations can be
used with any public static void methods. The @BeforeClass annotation is
executed before the first test and the@AfterClass annotation is
executed after the last test.
@Before and @After can
be applied to any public void methods. @AfterClass and @BeforeClass can be applied to only public static void methods.
Running the first unit test
Let's write our first test by performing the following steps:
1. We will create a test class under a test source package. Create
a Source folder named test and create a SanityTest.java Java class under
package com.packtpub.junit.recap.
It is a good practice to create test classes with a Test suffix. So, a MyClass class will have a MyClassTest test class. Some
code coverage tools ignore tests if they don't end with a Test suffix.
import
org.junit.After;
import
org.junit.AfterClass;
import
org.junit.Before;
import
org.junit.BeforeClass;
import
org.junit.Test;
public
class SanityTest {
@BeforeClass
public static void beforeClass() {
System.out.println("***Before Class is invoked");
}
@Before
public
void before() {
System.out.println("____________________");
System.out.println("\t
Before is invoked");
}
@After
public
void after() {
System.out.println("\t
After is invoked");
System.out.println("=================");
}
@Test
public
void someTest() {
System.out.println("\t\t
someTest is invoked");
}
@Test
public
void someTest2() {
System.out.println("\t\t
someTest2 is invoked");
}
@AfterClass
public static void afterClass() {
System.out.println("***After Class is
invoked");
}
}
In the preceding class, we created six methods. Two test methods
are annotated with @Test. Note that two methods (beforeClass andafterClass) are static and the other four
are nonstatic. A static method annotated with @BeforeClass is invoked only
once, that is, before the test class is instantiated, and @AfterClass is invoked after the
class is done with all the execution.
3. Run the test. Press Alt + Shift + X and T or navigate to Run | Run As | JUnit
Test. You
will see the following console (System.out.println) output:

Check
whether the before and after methods are executed before and after every
test run. However, the order of the test method execution may vary. In some
runs, someTest may
be executed before someTest2 or vice versa. The afterClass and beforeClassmethods
are executed only once.

Verifying test conditions with Assertion
Assertion is a tool (a predicate) used to verify a programming assumption (expectation)
with an actual outcome of a program
implementation; for example, a programmer can expect that the addition of two
positive numbers will result in a positive number. So, he or she can write a
program to add two numbers and assert the expected result with the actual
result.
The org.junit.Assert package provides static overloaded methods to assert
expected and actual values for all primitive types, objects, and arrays.
The following are the useful assert methods:
• assertTrue(condition) or assertTrue(failure
message, condition): If the condition becomes false, the
assertion fails andAssertionError is thrown. When a failure message is passed, the failure
message is thrown.
•
assertFalse(condition) or assertFalse(failure
message, condition): If the condition becomes true, the assertion fails andAssertionError is thrown.
•
assertNull: This checks whether
the object is null, otherwise throws AssertionError if the argument
is not null.
•
assertEquals(string message, object
expected, object actual), or assertEquals(object expected, object
actual), orassertEquals(primitive expected, primitive actual): This method
exhibits an interesting behavior if
primitive values are passed and then the values are compared. If objects are passed, then the equals() method is
invoked. Moreover, if the actual value doesn't match the expected value, AssertionError is thrown.
•
assertSame(object expected, object
actual): This supports only objects and checks the object reference using the == operator. If two different objects are
passed, then AssertionError is thrown.
•
assertNotSame: This is just the
opposite of assertSame. It fails when the two argument references are the same.
1. Create a AssertTest test class
under com.packtpub.junit.recap. Add the following lines to the class:
package
com.packtpub.junit.recap;
import org.junit.Assert;
import org.junit.Test;
public class AssertTest {
@Test
public void assertTrueAndFalseTest() throws
Exception {
Assert.assertTrue(true);
Assert.assertFalse(false);
}
@Test
public void assertNullAndNotNullTest() throws
Exception {
Object myObject = null;
Assert.assertNull(myObject);
myObject = new String("Some
value");
Assert.assertNotNull(myObject);
}
}
In the preceding code, assertTrueAndFalseTest sends true to assertTrue and false to assertFalse. So, the test should
not fail.
In assertNullAndNotNullTest, we are
passing null to assertNull and a
non-null String to assertNotNull; so, this test
should not fail.
Run the tests. They should be green.
2.
We will examine assertEquals and add the
following test and static import the assertEquals method:
import static org.junit.Assert.assertEquals;
@Test
public void assertEqualsTest() throws
Exception {
Integer i = new Integer("5");
Integer j = new Integer("5");;
assertEquals(i,j);
}
In the preceding code, we defined two Integer objects, i and j, and they are initialized with 5. Now, when we pass them to assertEquals, the test passes, as
the assertEquals method calls i.equals(j) and not i
== j. Hence, only the values are compared, not the references.
The assertEquals method works on all primitive types and objects. To verify a
double value, either use the overloadedassertEquals(actual,
expected, delta) method or just use BigDecimal instead of
using Double.
import static org.junit.Assert.assertNotSame;
@Test
public void assertNotSameTest() throws
Exception {
Integer i = new Integer("5");
Integer j = new Integer("5");;
assertNotSame(i , j);
}
The assertNotSame method fails only when the expected object and the actual
object refers to the same memory location. Here, i and jhold the same value but the memory references are different.
4.
Add a test to verify the assertSame behavior and
static import the assertSame method:
import static org.junit.Assert.assertSame;
@Test
public void assertSameTest() throws Exception
{
Integer i = new Integer("5");
Integer j = i;
assertSame(i,j);
}
The assertSame method passes only when the expected object and the actual
object refer to the same memory location. Here, i and j hold the same value and refer to the same location.
Working with exception handling
To test an error condition, exception handling feature is
important. For example, an API needs three objects; if any argument is null, then the API should throw an
exception. This can be easily tested. If the API doesn't throw an exception,
the test will fail.
If the expected exception class doesn't match the exception thrown from the code, the
test fails. Consider the following code:
@Test(expected=RuntimeException.class)
public void exception() {
throw new RuntimeException();
}
Ignoring a test
Instead of commenting a test, we can just ignore it by
annotating the test method with @Ignore.
Commenting out a test or code is bad as it does nothing but increases the code
size and reduces its readability. Also, when you comment out a test, then the
test report doesn't tell you anything about the commented-out test; however, if
you ignore a test, then the test report will tell you that something needs to
be fixed as some tests are ignored. So, you can keep track of the ignored test.
Use @Ignore("Reason: why do you want to
ignore?"). Giving a proper description explains
the intention behind ignoring the test. The following is an example of, where a
test method is ignored because
the holiday calculation is not working:
@Test
@Ignore("John's
holiday stuff failing")
public void
when_today_is_holiday_then_stop_alarm() {
}
Executing tests in order
For example, when you want
to write slow tests to insert a row into a database, then first update the row
and finally delete the row. Here, unless the insert function is executed,
delete or update functions cannot run.
JUnit 4.11 provides us with an @FixMethodOrder annotation to specify the execution order. It takes enum
MethodSorters.
To change the
execution order, annotate your test class
using @FixMethodOrder and specify one
of the following available enum MethodSortersconstant:
• MethodSorters.JVM: This leaves the
test methods in the order returned by the JVM. This order
may vary from run to run.
• MethodSorters.NAME_ASCENDING: This sorts the test methods by the method name in the lexicographic order.
public class
TestExecutionOrder {
@Test
public void edit() throws Exception {
System.out.println("edit
executed");
}
@Test
public void create() throws Exception {
System.out.println("create
executed");
}
@Test
public void remove() throws Exception {
System.out.println("remove
executed");
}
}
Run the tests. The execution order may
vary, but if we annotate the class with @FixMethodOrder(MethodSorters.NAME_ASCENDING), the tests will be executed in the ascending order as follows:
@FixMethodOrder(MethodSorters.NAME_ASCENDING)
public class
TestExecutionOrder { … }

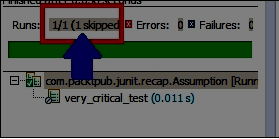
Learning assumptions
Like Assert, Assume offers many
static methods, such as assumeTrue(condition), assumeFalse(condition),assumeNotNull(condition), and assumeThat(condition). Before executing a test, we can check our assumption using
the assumeXXXmethods. If our assumption fails, then the assumeXXX methods
throw AssumptionViolatedException, and the JUnit
runner ignores the tests with failing assumptions.
public class Assumption {
boolean isSonarRunning = false;
@Test
public void very_critical_test() throws
Exception {
isSonarRunning = true;
Assume.assumeFalse(isSonarRunning);
assertTrue(true);
}
}
Here, for simplicity, we added a isSonarRunning variable
to replicate a SONAR server facade. In the actual code, we can call an API to
get the value. We will set the variable to false. Then, in the test, we will reset the value to true. This means SONAR is running. So, our
assumption that SONAR is not running is false; hence, the test will be ignored.

Exploring the test suite
To run multiple test cases, JUnit 4 provides Suite.class and the @Suite.SuiteClasses annotation.
This annotation takes an array
(comma separated) of test classes.
Create a TestSuite class and
annotate the class with @RunWith(Suite.class). This annotation will force Eclipse to use the suite runner.
Next, annotate the
class with @Suite.SuiteClasses({ AssertTest.class, TestExecutionOrder.class,
Assumption.class }) and pass comma-separated test class names.
The following is the code snippet:
import
org.junit.runner.RunWith;
import org.junit.runners.Suite;
@RunWith(Suite.class)
@Suite.SuiteClasses({
AssertTest.class, TestExecutionOrder.class,Assumption.class })
public class TestSuite {
}
During execution, the
suite will execute all the tests. The following is a screenshot of the suite
run. Check whether it runs seven tests out of the three test fixtures: AssertTest, TestExecutionOrder, and Assumption.
Working with timeouts
JUnit tests are
automated to get quick feedback after a change in the code. If a test runs for
a long time, it violates the
quick feedback principle. JUnit provides a timeout value (in milliseconds) in
the @Test annotation to make sure that if a test runs longer than
the specified value, the test fails.
@Test(timeout=10)
public void forEver() throws Exception {
Thread.sleep(100000);
}
[Core Java Interview Questions]
We recommend you take Big Data Hadoop class room training at eMexo Technologies in electronic city, Bangalore to learn more about Big Data Hadoop.
1 Comment:
Upgrade your skill to Big data Hadoop
https://www.emexotechnologies.com/courses/big-data-analytics-training/big-data-hadoop-training/
Learn Big data Hadoop
Post a Comment